How to Add Client in Server (PART - I)
In our last article, we have added a client in the domain using a default administrator account. The administrator account can be used in a LAB environment. But in a real company environment using the administrator account for joining or disjoining process create a huge security risk. Always avoid using the administrator account for this process. In this article for the server-side process, we would create a special user account.
For this article, I assume that
- · ADS is configured on server 2003 and working
- · DNS is configured on server 2003 and working
- · Client computer is connected with Server.
If you miss any of above see our previous articles.
Right click on Users folder and select User from New options
In the open window fill the user information and click on next
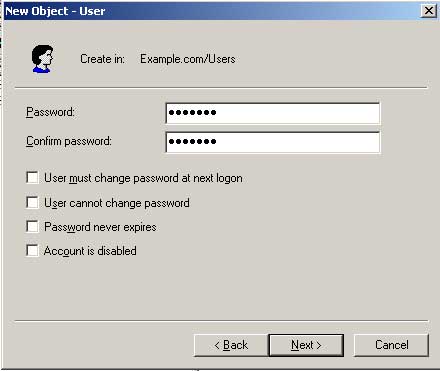
On password screen give the password and remove tick mark from User must change password at next login
On summary screen click on Finish button
Verify that you have successfully created user accounts
Now make this user the member of built-in Domain Admins group
The user must be shown in the Member tab of the Domain Admins group's properties
Now create a computer account for the client computer. Right click on Computers folder And select Computer from New options
Give client computer name [ Make sure you give an exact same name which you have on the client computer, Check it before giving here on client computer ]
On managed screen Do not check on This is a managed computer Click on next
On next screen click on finish
Next step is to grant access to add a client in the domain. To do this open domain controller security policy
In left pane expand the local polices. In local polices select User Rights Assignment and in right pane double-click on Add workstation to the domain
Now add administrators [group], administrator [Account], and Vinita[ User which you want to grant the access]
Now refresh the group policy by running GPUPDATE commands in run
We have completed all the necessary steps on a server in our next article we will see how to use this account to make the client.


No comments: